 During the playoffs hockey teams need to raise the bar with their performance. The same holds true for photographers. News services from both teams are in town and all looking for the best position to photograph their team from.
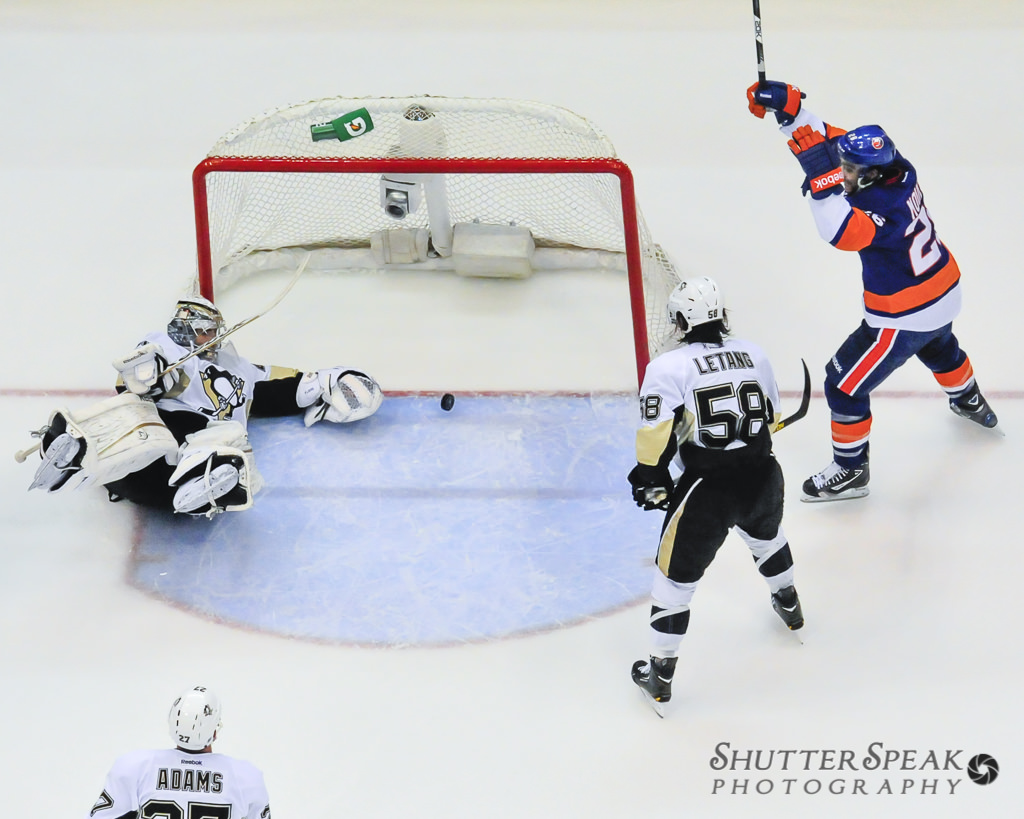
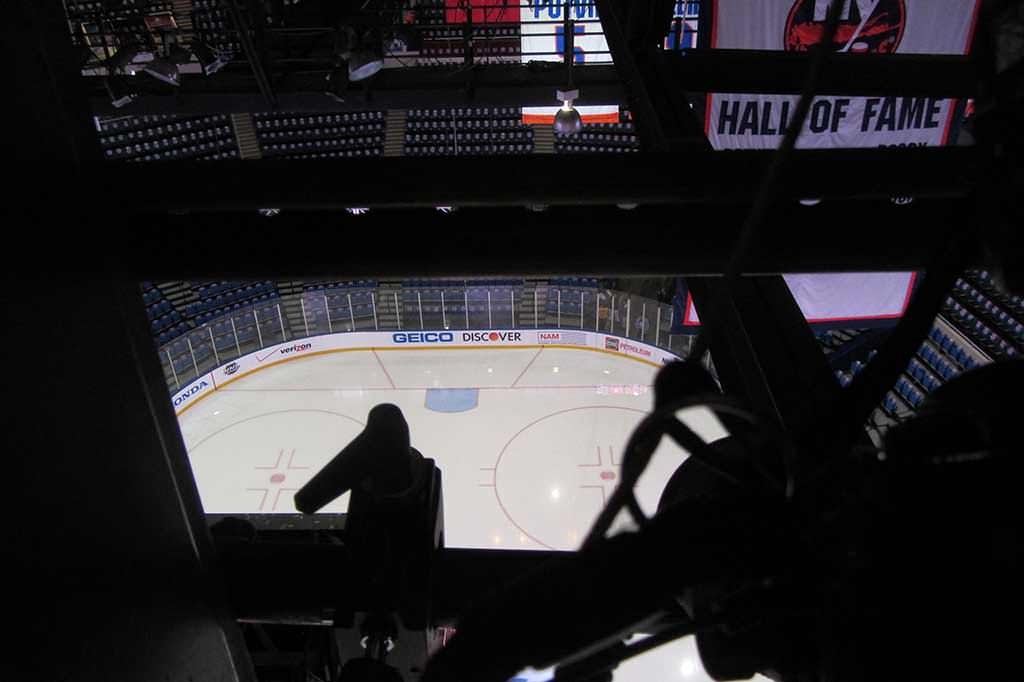
Placing a camera above the net provides an interesting point of view. During the Stanley Cup Quarter finals I had a camera up in the rafters above the net.
If you have ever wondered how something like this is set up, read on! First you will need the proper equipment to mount the camera. The next step is to get permission from the team to place a camera up in the rafters. Once this is in place you will need to decide on the type of shot you are looking for.

Equipment
First lets talk about what type of equipment you will need. If you don’t have the proper equipment there really isn’t much point in asking the team for permission.
Every piece of equipment you mount will need to be secured by a safety cable. This is a safeguard should your camera mount fail.
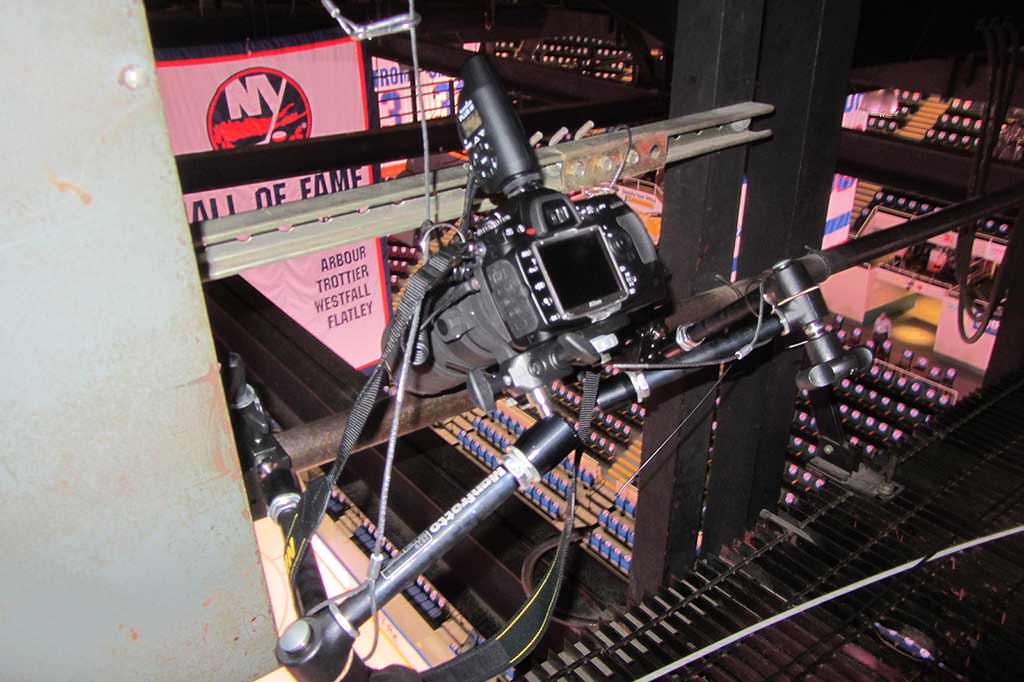
In my setup I have mounted my camera with 2 Bogen – Manfrotto Magic Arm w/Camera Platform (#2930) with a Manfrotto 035 Super Clamp
on the end of each. One magic arm will connect to the bottom of the camera, the other will connect to the bottom of the camera lens. You will also need 2 Chauvet Safety Cable
s to attach to each Magic Arm, the camera and the lens.
Next you will need a method of triggering your camera. I use the 2 Pocket Wizard Plus III Transceivers to trigger my camera. I know there are cheaper alternatives but the Pocket Wizard is rated for 1600 feet. In an NHL arena this is a must.
I did test triggering with a set of Cactus V5 Wireless Flash Triggers which do work at only a fraction of the price but they are only rated at 300 feet. The other major downside is that when you stop pressing the trigger release the Cactus continues to fire the remote camera.
It felt like the cactus was not able to handle a continuous signal which is needed when shooting in a rapid fire type situation (which hockey definitely is). The camera continued to shoot with the cactus for several seconds after the trigger button was released. The Pocket Wizard does not behave in this manner and stops firing the remote camera as soon as you let go of the trigger button.
You will also need the proper cable for your camera. I use the Cactus cable with my Pocket Wizard. It works properly and is a fraction of the price. Here is the link to the cable for Nikon D3s: Cactus V5 Shutter Cable for Nikon D700, D300s, D3x & D3s Cameras. Make sure you buy the proper cable for your camera 🙂 You will need at least a 200 mm lens for you camera as well. You don’t need vibration compression or anything fancy on the lens as it will be mounted. I use the Sigma 70-200mm f/2.8 Telephoto Zoom Lens
and it works great (although it does have VC).

Permission
Next you need to get permission to put the camera up top. My local team was surprisingly cool about this. For me all it took was an email to the teams media contact and it was all set.
Setup
When you arrive at the rink to mount your camera on game day make sure you have checked all your equipment before hand. Once it is mounted there is no going back to check it or make changes.
Set everything up before you go up to the rafters. Set up your camera and mount it to the magic arms. One arm connects to the camera and the other, the lens. Make sure your safety cables are already attached to your camera, lens and pocket wizard.
This way when you go up to the rafters you can attach your camera right away. You don’t want to drop anything when your above the ice.
When you set up the Pocket Wizard be sure to check with your team contact to make sure you are not on a channel used by another member of the media. The Pocket Wizard has 17 channels so finding a free one should be no problem.
Make sure the transmitter and receiver are both on the same channel. The Pocket Wizards are transceivers meaning they can both transmit and receive. I set the one on the camera to Receive Only mode. My other, which I keep with me, is set to Transmit Only mode. This prevents them from relaying signals to other Pocket Wizards in the building. I do this to maximize the battery life of the remotes triggers.
The settings I used on the camera were ISO 2500, f 4 at 1/1000 sec. Your settings may vary depending on the lighting in your rink and the capabilities of your camera.
Go Time
 With camera in place all you need do now is wait. In this case my camera was on the opposite end of the ice I was shooting on. When it looked like someone was about to shoot at the net I simply pressed and held the button on my transmitting pocket wizard and prayed! Once the action was over I stopped shooting.
If the camera was overlooking the same side I was shooting on I would have mounted the Pocket Wizard to the flash shoe on my camera. Mounting the transmitter to the flash shoe would have triggered my remote camera whenever I took a picture with my camera at ice level. Pretty neat, eh?
Support The Blogger
If you feel this article is helpful please support the blogger by using the links to products in this article or the link below:
Thank you.
- Nikon Z Shooters 28-400 or Tamron 50-400 Don’t Buy Before Watching - December 19, 2025
- World Photography Day - August 14, 2025
- Nikon Z Focus Messing Up? Try This Simple Fix! - July 22, 2025

