(Updated Dec. 15, 2024)
Photographing the sport of ice hockey can be one of the most challenging sports a photographer will ever shoot. On the pro level, the game moves at unimaginable speeds. It’s hard to believe the players can make such great plays in the blink of an eye.
As a photographer, you have to worry about keeping up with such fast paced action. You also have to be able to predict where things are going to happen next. If you wait for them to happen in this game, it’s already too late.
When shooting for the media, you will sometimes have the ability to shoot through a small opening along the glass about the size of a camera lens. When using the opening (placed there for the media by the NHL) there is the ever present danger of having your lens hit (when I say hit, I really mean smashed) by a puck. More on that later.
On an amateur and even semi-professional level, the game doesn’t move nearly as fast, and often the main challenge is lighting. Sounds fun right? Well, it really is!
I have shot hockey in the smallest of rinks and shoot on the pro level. I have made my fair share of mistakes so hopefully, after you have read this, you won’t have to. I will share what I bring to a game, where I shoot from and what settings I use. I won’t get too technical. Rather than explain why I use certain settings with all sorts of technical language, I will just tell you what settings I use.
You will have to experiment because the lighting in every rink will be different. If you are shooting little kids, the game will be at a much different pace than at the high school level. So will the lighting because local rinks tend to shut off some lights when local leagues are playing to save money. They tend to turn all the lights on when high school or college teams are playing. Also camera settings will vary depending on what camera and lens combo you use.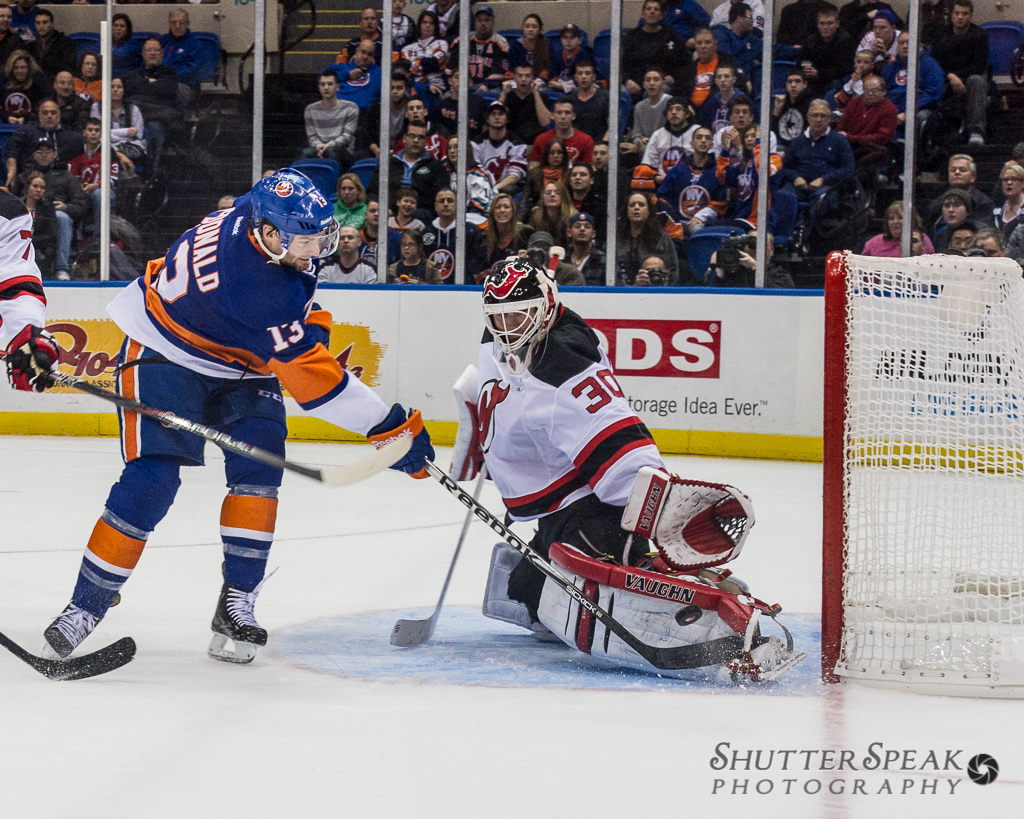
Know the Game
The first step to photographing great hockey is to have a basic understanding of the game of hockey. Knowing the rules and the flow of the game will help you get better shots. I have played ice hockey most of my life (I still play) and a have very good understanding of the game. Knowledge of the sport helps you point your lens in the right place ahead of time. This is critical when shooting hockey.
If you are not familiar with hockey, turn on the TV and start watching games. Notice how the players will often dump a puck into the offensive zone and then chase it down. Notice how the puck whips around the boards! Having this knowledge will help you keep your lens out of harms way when shooting for the media.
Prep
Most NHL games start at about 7:00 or 7:30 PM. This gives me plenty of time on game day to make sure my batteries are charged for my camera, my compact flash cards are cleared, my flash batteries are charged and my lenses are free of any debris. It’s also a good idea to go over your camera settings to make sure you haven’t left on any settings from your last shoot that would prevent you from getting great shots on game night.
Also take a look at the game match up. Who are the stars on each team? Who is on a scoring streak? Is there bad blood between these teams? Knowing the teams and the main players helps get great shots. Most teams send out an email game day with up to the minute stats for you to review. Make sure you are on the email list.
Camera and Settings
So about that camera… Shooting hockey is just not going to be possible right now without a DSLR camera. Really just about any one will do but the more recent the better. A 70-200 mm zoom lens or similar is a must as well.
I shoot with Nikon cameras so I am going to give you a few recommendations in the Nikon world. Other brands will work as well, I just use Nikon. The Nikon Z 9 would be my camera of choice. If that is out of your price range (I get it) then the mirrorless Nikon Z 6 III would be my next choice. I use a Nikon Z 70-200mm f/2.8 Zoom Lens. But to fully cover the rink you will need a 24-70 lens and a 400 mm lens as well. The 24-70 will get you those up close celebration shots and the 400 the shots of action at the other end of the rink. If I could only pick one, it would be the 70-200mm lens. Other cameras to consider are the Sony a9 II at about $4500 and the Sony a6400 with the 55 to 210mm lens at about $1200. If we were at a camera store together my advice would be to buy a mirrorless camera like the Nikon Z or Sony. This is were all the latest advances in camera technology seem to be moving.
I typically do not shoot at f2.8, so if you do not have an f2.8 lens, don’t worry, you can still get great shots. I will typically shot in manual mode at ISO 2000 and a shutter speed of 1/1000th of a second at f/4. Do not use a flash when shooting ice hockey.
You may be thinking, why you would do that if you have a lens that can shoot as fast as f/2.8. The reason is depth of field. I want most of my shot to be in focus and f/4 to f/5.6 give me the speed and depth of field I am looking for. Shooting at a slightly higher f stop will help you avoid having the camera focus on a stick and have a players face become out of focus due to shallow depth of field.
If you camera doesn’t shoot clean enough to use a high ISO like 2000 then feel free to use a faster setting like f2.8 if you can but remember, you have been warned ;-). The minimum ISO you will probably be able to get away with will be around ISO 1600.
I also use Auto Focus Area mode on my camera and the Continuous Focus mode on my lens because the action is constantly moving. I like the 70-200 mm lens because it allows me to get some wide shots or zoom tight in on a players face. The Sigma is a sharp, fast and versatile lens. I highly recommend it.
White Balance
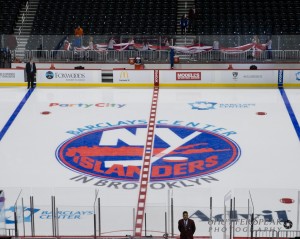
Once the game is about to begin, all the main lights are turned on in the arena. This is usually as the home team comes out and before the national anthem. I usually take this time to set my white balance. I use a custom white balance setting metered off the ice or the stairs (the stairs are usually cement and a nice neutral gray color) and never let my camera automatically set the white balance.
I have found that the auto white balance will sometimes change between shots and give a series of game shots that look a bit off in color. I have often noticed that the auto mode is too warm for my tastes giving the ice a darker color, almost grayish color, which it shouldn’t have. After some experimentation I have settled on a white balance of 4000K which gives me the balance that I am looking for. It’s important to note that the white balance in the arena you are shooting at may be significantly different.
To get a better understanding of white balance and how it affects photos take a look at this article. If you are not sure on how to set your white balance, do a quick search on Google for your particular make and model camera. Remember to take your reading from a neutral gray or white color in the light you are shooting in. Often lens cleaning clothes are made neutral gray and are great to meter off of.
Where to Shoot From
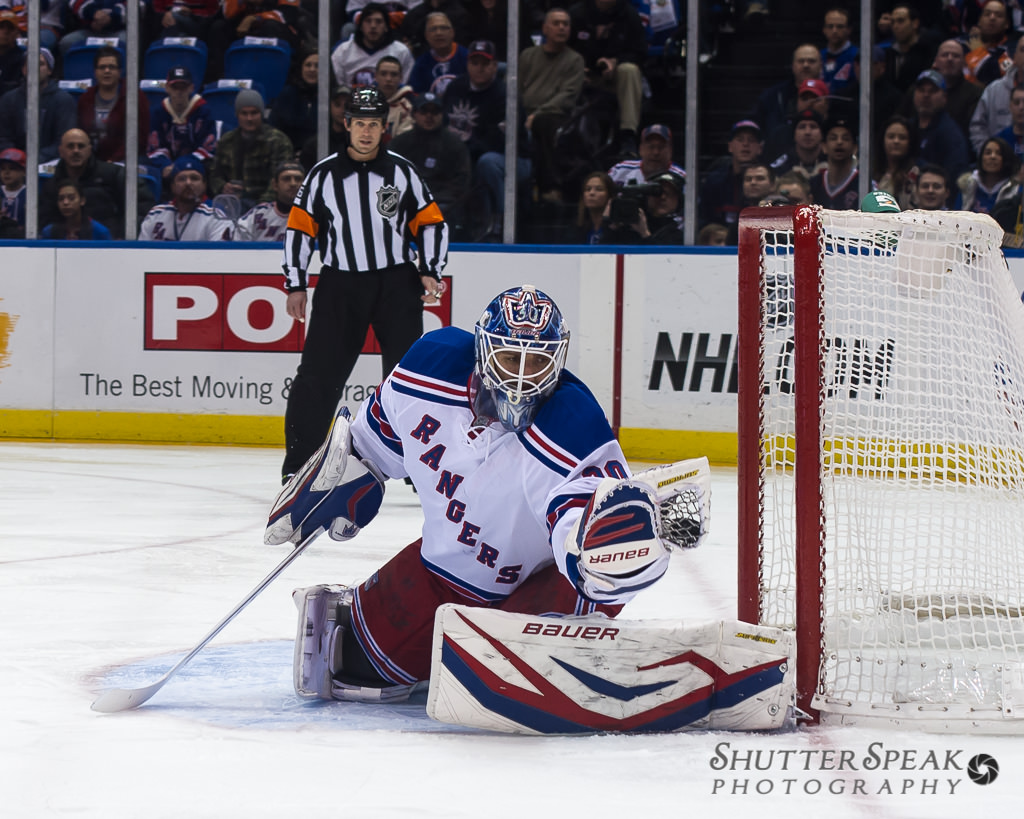
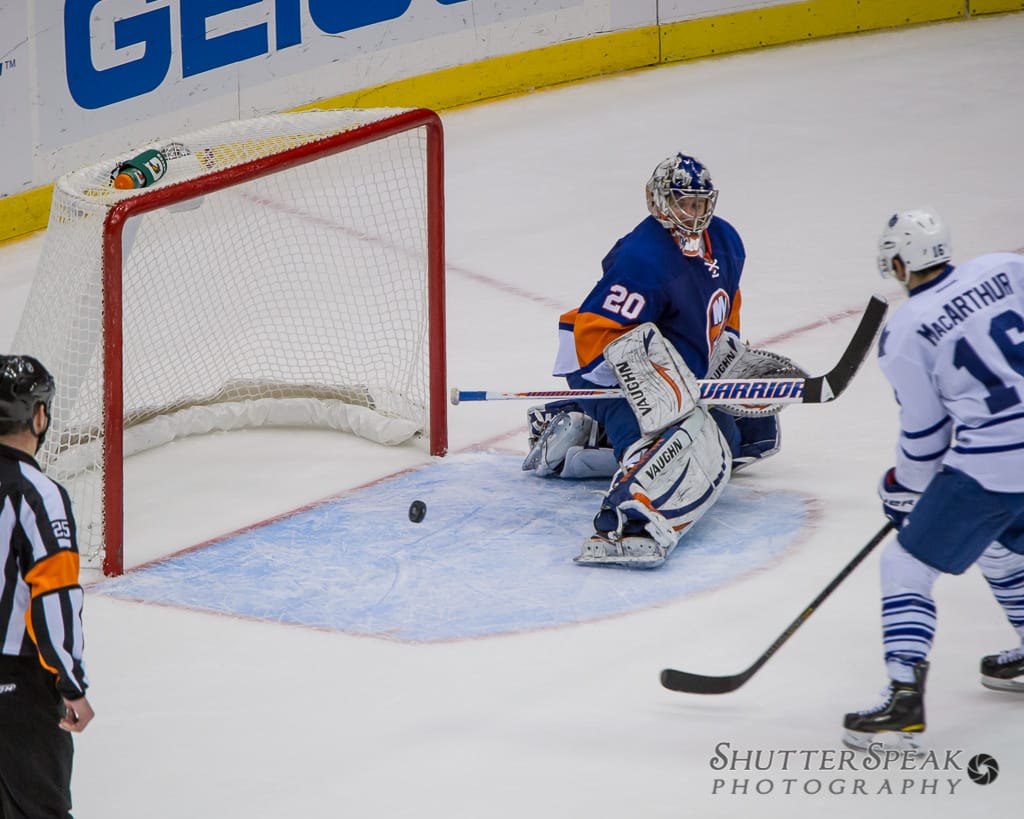
The NHL has predetermined where the press can shoot from by placing removable cut outs in the glass for a photographer’s camera lens. These cut outs are located by each goal line. There are usually six of these openings.
I prefer to shoot from just a few feet in front of the goal line on ice level. From this angle you should be able to get good shots of the goal, players celebrating after scoring, and behind the net where you can look for some great hits when players are battling for the puck.
Angling your camera will also get you shots along the boards as players make their way into the offensive zone. This gives you those cool shots that look like you were on the ice when you took them (but you’re not that crazy, right?).
In major markets there are more media than there are spaces to shoot. In that case, just shoot through the glass on ice level. The plus side to this is that you do not have to worry about your lens being hit by a fast moving puck.
It’s also very important to remember that when the play is along the boards in the corners there are likely to be big hits. The boards and glass are made to flex. If there is a hit by the glass that you are shooting through make sure you pull yourself back to avoid getting hit by the flexing boards and glass. Having a camera to your eye when these boards flex can lead to a broken lens, a black eye and defiantly a bruised ego!
Remember that often teams will dump in the puck by whipping it around the boards as they cross the blue line. This is the time where a camera lens is in the most danger of getting hit by a puck. Make sure to pull your camera back out of the glass when players “dump” in the puck!
I also like to change things up and shoot from center ice at the top of the second level (often where the TV cameras are). This is just above the glass and gives a great view of the entire rink. From here you will get the opportunity to shoot at both goals. This is a plus because you can catch action on both sides of the net, rather than limiting yourself to just one side.
You will need at least a 400 mm lens from here. If you cannot afford one, consider a 2x Teleconverter for your 200 mm lens. Make sure it matches your lens’ make and model for compatibility!
Hockey Photography Tips…
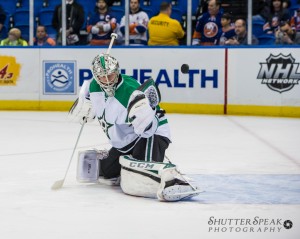
So how do I get that shot of the puck in the air just as the goalie makes a great save? These are trained athletes with amazing reflexes. A slap shot in the pros hits over 100 mph! You may think you will never be able to get the shot, but you will if you know this one secret.
Remember, about a sentence ago when I said these are trained athletes with amazing reflexes? We can use that to our advantage.
For a goalie to stop a shot traveling at speeds of over 100 mph he has to react before the shot reaches him. Typically, he will go down on both knees to cover the low ice.
This is where you, as the photographer have a window of opportunity. It’s a small one, but one that will help you get great shots consistently. When the play is in the offensive zone, aim you camera at the goalie.
Zoom in (or out) wide enough to get about 8 feet in front of the goalie and focus. This is to capture any action around the net. Watch the goalies knees. A hockey goalie has trained his reflexes to be some of the fastest in any pro sport. Once his knees start to bend, hit the shutter release on your camera and hold it. Keep firing away as fast as your camera can take pictures. If the puck makes it to the net, odds are, you got the shot!
How do I get a player taking a slap shot? This is similar to how to get the goalie save shot. Your best bet is to point your camera at a defenseman whose team is currently attacking. He should be by the blue line.
During a power play is probably your best time to accomplish this. To have motion in the stick set your camera’s shutter speed to about 1/350 of a second at the pro level. To freeze the stick in mid bend set your shutter speed to about 1/1000th of a second. Wait for the attacking team to pass to your defense man and start firing away as soon as he raises his stick to shoot.
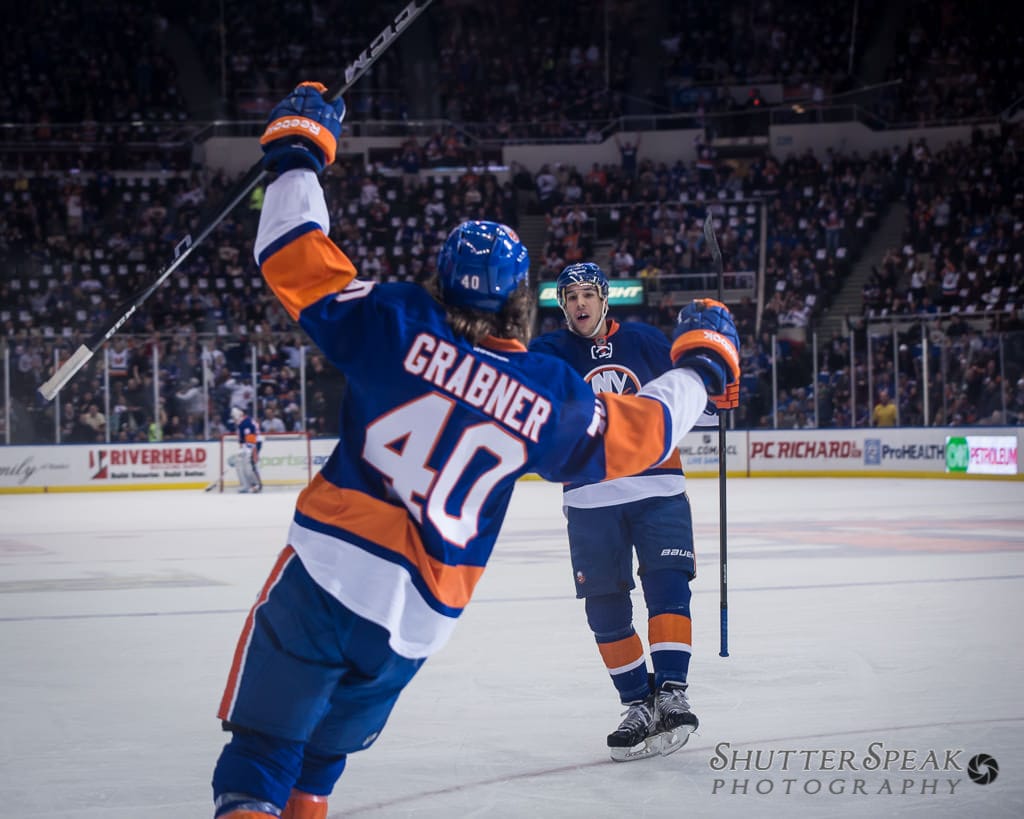
Don’t Stop Shooting When the home team scores a goal you may feel the urge to join in on the celebration. A horn sounds, spot lights on the players, crowd jumping up screaming! You may be tempted to join in… Don’t 🙂 Now is the time for you to get some great shots of the players celebrating. A great hockey shot doesn’t have to be action, often its emotion. So look for these shots just after a goal.
If you have questions, please feel free to ask. I am also open to suggestions for this article.
For more educational videos follow me on YouTube.
3/2/2019 – Check out this new article on photographing hockey using the Nikon Z6.
Editor’s note: I have added a new article on shooting from above the net. Check it out here: http://shutterspeak.net/photographing-hockey-from-above-the-net/
1/17/14 – Check out another new article on Post-Processing Hockey Photos.
3/2/14 – Want to see what it is like to shoot an NHL game? Check out my YouTube video shot using a Go Pro as I photograph an NHL game:
Support the Blogger
If you feel this article is helpful please support the blogger by using the links to products in this article or the link below:
Thank you.
- Nikon Z Shooters 28-400 or Tamron 50-400 Don’t Buy Before Watching - December 19, 2025
- World Photography Day - August 14, 2025
- Nikon Z Focus Messing Up? Try This Simple Fix! - July 22, 2025

Nice article! My one critique is that you mention f2.8 as being faster, but f2.8 is an aperture, not a shutter speed. It gets wider, not faster.
While you are correct, f2.8 is wider, a lens with a lower aperture number, or wider opening, is considered a faster lens. The reason being is that you can shoot faster at lower iso’s because the lens lets in more light.
Thanks for the tips, I will keep this in mind for the next game.
Thanks for the article! Helps a lot when shooting for a high school yearbook, where the experience is low and I am still learning. Hockey is one of the hardest sports to shoot, and I’m hoping these tips will help improve my pictures at the next game. Thanks, again!
Joe, Thank you for sharing all this helpful information. I have two questions for you: 1) With a D4 would you ever push your ISO to 3200 to get your f stop up to 5.6 and still have a publishable image. 2) Due to the limited depth of field at F4, are you using a point on the ice in the center of the action, as your focus point at times.
Hi John –
I would have no problem pushing a Nikon D3S, D4, or D4S to iso 3200. They can handle it for sure but I wouldn’t go any higher than that. I don’t usually have an issue with depth of field though at ice level so I tend to stick at f/4. If I was shooting 400 mm from the second level I would defiantly go f/5.6 because then I would need the extra depth.
I usually let the camera choose the focus point and I use either dynamic area or auto area focus. I do recommend stepping down the focus points to 11 or 21 to allow the camera to focus faster. I tend to avoid single point focus because the game is just too fast.
If I am thinking there is going to be a play at the net I will focus on the goalie beforehand so that the camera doesn’t need to search for focus once I start shooting. So to answer your question, no I do not focus on a point on the ice but rather the players.
Hope this helps.
Joe
Joe, Your response was extremely helpful, as was your posting about post-processing. The rink I will be shooting at is not as bright as an NHL rink, so to get a properly exposed image at 5.6, I will need to shoot at ISO 3200 and open up about a 1/2 stop and open up the shadows in LR by 15 -22. So your response puts me a bit at ease. Your assistance is very much appreciated. John
Thanks for the articles. Very good info.
Any opinions on the d7100 buffer size (RAW) and high ISO performance for for shooting hockey, or would I have to go with JPEG.
Don
If I were shooting a D7100 I would shoot RAW provided you have the time and are not on a tight deadline.
I would caution you though that auto iso, auto distortion control, and long exposure noise reduction may need to be set to off. I have heard reports that these settings (and combinations of them) can half a D7100’s shooting speed in RAW. That would cut you from 6 to 3 fps.
If you need the extra FPS there is nothing wrong with shooting jpeg as long as you have your white balance and exposure nailed.
In terms of high iso, it is just going to depend on the lighting in your rink. A high school game tends to have all lights on in a local rink. A recreational league usually only gets half of the lights on to save the rink money. An NHL rink is going to have good lighting almost always. It is going to be a judgement call but the D7100 is your best bet at that price point.
Joe, thanks very much for your tips in this article, as well as the article on post-processing hockey photos. Very helpful. I was wondering what your thoughts were in general on full frame vs. crop sensor bodies as they relate to hockey photography, specifically in the area of high ISO and noise. I also use the Sigma 70-200mm f/2.8 but with a Canon 60D (crop sensor) body. I typically shoot at rinks with less than stellar lighting and end up regularly pushing my ISO to 3200, 4000 or even 5000. LR 5 can only do so much at those high ISO’s. In your opinion is it really worth the premium to “upgrade” to a full frame body? I’ve heard and read arguments on both sides!
I think what is most important is to balance what fits best into your life. Cameras are expensive. If you are shooting for the media a full frame camera is expected, but your getting paid to be there. If you can afford it and simply want a new camera then go for what makes you happy. Moving to a full frame camera is an investment. It means a change in camera and lenses as well (unless you own full frame lenses already). There is no easy answer because the choice is up to you and what fits into your lifestyle. Never feel bad about which sensor you have, a sensor doesn’t create an image, you do 🙂
Understood, and that all makes sense. I’m actually very happy with the crop-sensor camera for the majority of what I shoot. The exception, though, is shooting hockey…thus my original question. Most of my lenses fit both crop-sensor and full frame so the investment is definitely the body. I’m just curious if you think the full frame sensor does a markedly better job of handling the noise at the higher ISO’s necessitated by the lack of lighting in these rinks. Thanks again for your thoughts!
Well all things considered if you look at the top cameras in terms of low light and image quality in DXO Marks they are all full frame. The Nikon D3S, DF, D4S, D810, D800, Sony A7, A7R, A7S, Canon 1DX. So the numbers don’t lie, full frame wins.
The next question is what is your return on investment. Only you can answer that.
I am going to see the Invicta dynamos in Kent tonight and my question is how can you shoot through the protective net above the glass as we like to sit in the centre so as to see both ends of the game ?
Shooting through a net is tough. Your camera may focus on it inadvertently and it can ruin an otherwise great shot. One trick is to set your aperture as wide as you can. For example, if you are using a lens that can open up to f/2.8 then use f/2.8. This will create a shallow depth of field when you focus on the players making only the players in focus. If you are close enough to the net, the net will almost disappear in the photo. This trick works best when you are in very close proximity to the net.
Oh my goodness! Incredible article dude! Many thanks, However
I am encountering issues with your RSS. I don’t know
the reason why I cannot join it. Is there anybody else getting identical RSS issues?
Anyone who knows the solution will you kindly respond?
Thanks!!
Going to a hockey game tomorrow (Habs vs. Isles) and decided to research how to get some good shots at it. Behold this article! Thank you! It was ironic that the pictures (and your background image) are of the very rink I’ll be shooting (attempting to) tomorrow. I’m not a professional, but serious about adding photography to my list of skills, so that one day I can become a professional. I’m a big hockey fan too, so it would be great if I could somehow tie these two loves of mine like you have. Thanks for the tips! Will give it a shot (cheesy pun intentded).
Enjoy the game. Be sure to post back if you get some good shots.
So disgusted with myself… I researched settings, I formatted my cards, i charged my batteries… I get to the game. Sit down all excited to try to get some decent shots, and I see “No card in camera” message. Then it hits me. I left my only card in the computer!!! My heart was broken, and my stomach turns every time I think about it (even many hours later, I’m still sick over it). There’s not a bad seat in that arena! I could have gotten the most amazing shots… if only I wasn’t such a ditz! lol
It happens. But on the bright side there are 84 games in a season. You can always go to another game 🙂
LOL… true. You optimist you! 🙂 thanks again for all the tips in this article. EVENTUALLY I’ll be able to use them lol
Great advice Joseph. I just started shooting hockey here in Pittsburgh. I note you say: ISO 2000 and a shutter speed of 1/1000th of a second at f/4.
The settings I shoot at are ISO 1000 and a shutter speed of 1/800th at f5.6. I am going to take your advice about white balance as my ice keeps coming out greyish and it is really bugging me!
Thanks,
Matt
Hi. I have a Nikon 7100 with 18-140 lens. Can you recommend the setting I should use for a hockey game. I’m getting a lot of grainy pics. I use 1000 ISO. When I go higher it gets darker.
Hi Carolyn,
When you raise your ISO your pictures should get brighter, not darker but you will have more noise. However, noise can be removed in post processing using a program like Adobe Lightroom. It is important to make sure your aperture is as wide open as your lens will allow. The lower the number the better. Good luck.
Joe
Thanks! I will look into the Lightroom
Hi Joseph, Thanks so much for sharing all this information. I am photographing my first hockey game tomorrow and I feel much more confident now. It is an amaterur game so I expect the rink to be pretty dark. I have only ever played field hockey (in goal) but having watched plenty of hockey I hope I can read one or two plays. I don’t think there are holes in the glass at my rink but I was pleased to see you can shoot through the glass and still get some shots out.
Cheers,
Howard.
Good luck with your shoot!
Hey man, this article has been instrumental for us in shooting for our new club in the UK. The Nottingham Panthers. You can check out our work here. http://www.panthersimages.co.uk
Cheers
Glad I could help out… you guys have some great images on the site. Very well done.
Great article Joe! You don’t see many on photographing hockey. I’ve been taking pics for the university and the rink they play in I have to shoot through plexi and it’s not new so quality isn’t great. I find if I’m perpendicular, shots are better but if on an angle, degradation of image (soft) comes into play.
Do you have any tips for shooting through plexi?
Thanks!
Bad glass is always a problem. I look for a clean patch and I use a rubber lens hood to cut down the glare to get better contrast in the images. With the rubber lens hood you can press it up to the plexi to avoid and reflections from behind you being picked up by the lens.
Hi Joseph,
First thank you so much for this article, there is so much great information and it’s very much appreciated.
I have been shooting amateur hockey for several years as a volunteer and was wondering if you elaborate on how you obtain such sharp focus. For example do you find a particular “case” for auto tracking works better than another. ( weighed to ignore objects in way, or erratic movements etc). Majority of mine are through the glass. The main area I notice softness is in the players faces – may be due to lower light under cage,fishbowl etc?
Camera is canon 5D mark IV
Here’s a link to my pics.
https://www.flickr.com/photos/dartmouthwomenshockey/
Any advice would be greatly appreciated.
I stick with the single focus mode (not continuous or 3D tracking) and generally use a single focus point. I don’t ever want to miss a shot because my camera has decided to focus hunt because a player or ref has come into view closer to the action then where I intend to shoot. It also speeds up the amount of frames per second the camera can fire off. That being said, your shots look great. Try to experiment and when you find a method that works for you stick with it.
Great article with many helpful hints. I have been shooting hockey for 8 years from mites up to high school age. I have seen an improvement over the years in my shots. Just from knowing the game and the players helps anticipate the scoring and hits. Our rink even got new LED lighting 2 years ago which really improved the shots. Currently I use a Cannon 80D with a Sigma HSMII 70-200 F2.8. The settings I use are ISO 3200, 3.5 and speed of 1/800-1/1000. I think my shots are good, but I want them to be great. So I have a few questions. The main issue I have is grain and noise. You mention using Lightroom to help alleviate this problem. Is this just for JPG or RAW? Reason being is I shoot JPG at games and I don’t have Lightroom. Do you recommend RAW over JPG? I also use auto white balance, which I will try your technique next time. I would like to go 4.0 but I feel like I have to raise my ISO in order to do so which would cause more noise than what I am already getting. Also with my new 80D I am getting more out of focus shots than with my older body. Do you recommend using back button focus? Also does a lens with Image Stabilization make a difference in getting really sharp shots?
Hello – some great questions here. First, it sounds like you are NOT on a deadline. In this case I would shoot RAW. When you shoot RAW you have a much greater ability to apply corrections such as noise reduction when you post process your photos. There are many noise reduction programs out there however, you will never regret getting Lightroom, especially if you take a lot of photos. It will help you process them and keep them organized. As for the back focus button, I don’t think this is the answer. I think you may need to reduce the number of focus points your camera is using. I typically will use only a single focus point when shooting so the camera never focuses on the wrong player or an object in the background. As for image stabilization in a lens, you can never go wrong using this feature.
Hi Joseph, thanks for a really good & inspiring articles on hockey photography. Many useful tips here, especially when it comes to focus issues. I have been photographing my son matches from 8 year level – now he´s 15, so think I have captured the team ´s development quite well, with thousands of pictures ( and a awful lot of bad ones). I have now moved to the Nikon D5 – tried for first time yesterday. Still need a lot of practice, little bit confused of right focus mode. And focus worked a bit too slow sometimes (but also bad light) – so need to go through my settings. You´re not recommending 3D tracking ?
Best, Lena
Although the 3D tracking mode on the D5 is amazing I recommend you switch either center weighted or less focus points. Also use single focus mode as opposed to continuous focus mode. This will stop the focus hunting that is likely slowing down your frames per second while shooting.
Hi Joe,
I was wondering if you could help me. I am in the market to purchase a new model Nikon camera and preferably a Nikon lens to shoot my sons hockey games.
Can you please recommend the best and newest model camera and lens for this type of photography. The Nikon D500 was recommended to me, as was the Nikon 7500 and D750.
Also, I understand that the lens is probably more important then the camera body. Could you recommend the best Nikon (or Tanron) lenses for me to purchase.
I’m not a professional photographer but I do want a great camera that I can use for the next few years. Thank you so much for your time, I really appreciate it.
Tanya Lucas
TanyaLucas11@yahoo.com
Like!! Really appreciate you sharing this blog post.Really thank you! Keep writing.
Thank you. I have not used my Nikon D3200 in years and my son and his mite team were skating during an intermission at an AHL game. I knew I could get better pics from it than I could get from my phone of course, but had no idea what settings to use and was afraid the auto settings wouldn’t turn out right. I’m glad I found your article. I took about 300 pictures and 95% of them turned out great!
Interesting article Joe. I also shoot some hockey myself, also with Z9 🙂
Starting another year of high school hockey photography. Glad to find your blog to get my head into the season. I am blessed to be photographing in an area with 3 rinks, 2 of which have press boxes above the rink. While I love being able to cover both ends of the rink from the press box, the most energy I capture in my shots comes from shooting through the glass. There are no holes the glass in these rinks. The glass in the oldest rink has been peppered with so many shots and has so many puck marks that it can affect the photo. Any suggestions about shooting through puck marks?
I usually shoot at 2.8. Seems to work okay in the press box. I have a new mirrorless and am more comfortable with kicking up the aperture and the ISO both near the glass and in the press box
Depending on how bad the glass is marked up I would consider getting up in the bleachers and shooting over the glass rather than through it. If that isn’t possible just look for the cleanest spot you can find – probably closer to the blue line.
I am a sports photographer, and the way you indicated to get the goalie when he starts to bend his knees, is the same method i use at rodeos, when a saddle bronc horse has his knees bent , i start to shoot to get his legs straight out, all horse jump at different rates.
I shoot z9 – and my problem is that because of the lighting conditions, i shoot at 1200 shutter, auto iso, which is about 16,000 and 4.5 – i need to get the iso down to at least 12,00 – i use a colour checker as well for white balance.
I really enjoyed your article. many thanks,
What is the best way to shoot through the glass in a hockey arena with all the smudges and marks on the glass.
You just need to find a spot with the least amount of marks. Glare is usually the bigger problem and for that I recommend a rubber lens hood.
Thank you so much for this article! I’m going to apply your recommendations today at my son’s game. Most of his team mates are from overseas and I want to get better at taking pictures of the team to send back to their parents each week.
Thanks for such a helpful article and your generosity in sharing technique.
2 questions.
1) when shooting through the glass do you encounter any problems with the camera focussing on the glass rather than play.
2) what metering mode do you use & do you use exposure compensation?